In this tutorial, you generate a simple application on Blockstack. The application is a single-page application (SPA) that runs completely client-side. The application has no backend API to talk to, other than the identity and storage API that the user provides. In this sense, the application is a completely decentralized, server-less application. You work through the following sections:
- About this tutorial and the prerequisites you need
- Generate an initial Blockstack application
- Review the basic application structure
- Start the server and view the application
- Understand the generated application code
About this tutorial and the prerequisites you need
For this tutorial, you will use the following tools:
- Node.js v10 or higher is recommended the minimum supported version is Node.js v8.
blockstack.jsto authenticate the user and work with the user’s identity/profile information
The application you build is a React.js application that is completely decentralized and server-less. While not strictly required to follow along, basic familiarity with React.js is helpful.
When complete, the app is capable of the following:
- authenticating users using Blockstack
- posting new statuses
- displaying statuses in the user profile
- looking up the profiles and statuses of other users
The basic identity and storage services are provided by blockstack.js. To test
the application, you need to have already registered a Blockstack ID.
Before you begin, verify you have the correct version of Node.js and its tools installed.
$ node -v
v12.10.0
$ which npm npx
/usr/local/bin/npm
/usr/local/bin/npx
If you don’t have these installed, take a moment to install or upgrade as needed.
Finally, make sure you have created at least one Blockstack ID. You’ll use this ID to interact with the application.
Generate an initial Blockstack application
You use the Blockstack App Generator to create scaffolding for a starter application. The generator can create scaffolding for any of these frameworks:
| Framework | Use this command to install |
|---|---|
| Plain Javascript | npx generator-blockstack --plain |
| React | npx generator-blockstack --react |
| Vue | npx generator-blockstack --vue
|
For example, to install a Vue scaffolding, you would use the npx generator-blockstack --vue command.
In this section, you build an initial React.js application called hello-world-tutorial. For this example, you will use the React scaffolding.
-
Create the
hello-world-tutorialdirectory.mkdir hello-world-tutorial -
Change into your new directory.
cd hello-world-tutorial -
Create your initial
hello-world-tutorialapplication.$ npx generator-blockstack --react npx: installed 338 in 13.792s create package.json create .gitignore create webpack.config.js create netlify.toml create firebase.json ... I'm all done. Running npm install for you to install the required dependencies. If this fails, try running the command yourself. > fsevents@1.2.9 install /private/tmp/testymc/node_modules/fsevents > node install added 775 packages from 455 contributors and audited 9435 packages in 20.934s found 0 vulnerabilitiesDepending on your environment you may have some warnings with the installation. Optionally, you can fix these before continuing to the next section.
Review the basic application structure
The initial application you create is a generic Javascript application you run
with a local express node. Before you continue, take a moment to examine the
scaffolding of this generic application structure. In the / (root) of the generated sample you have the following files:
| File/folder | Description |
|---|---|
.gitignore |
Git configuration file. |
package.json |
Specifies required packages. |
cors |
Configuration for cross-domain origin support. |
node_modules |
Package files installed by npm. |
src |
Application source code. |
public |
Starter web app code. |
In the public folder you find these files:
| File | Description |
|---|---|
favicon.ico |
Web app site icon. |
index.html |
Single page. |
manifest.json |
Tells the browser about the application and how it should behave. |
white-logo.svg |
Configures crawling and indexing. |
Start the server and view the application
When you start the server, it will create a Node.js server, start it locally, and open your browser ‘http://localhost:5000’. From the root of your new application directory:
-
Start the application server.
npm run startThe first time you run it, your system may prompt you to accept incoming connections.

-
Choose Allow.
The system opens your browser to
http://127.0.0.1:3000.You should see a simple application:

-
Choose Sign In with Blockstack.
The application detects whether the user has the Blockstack client edition installed or not. This is done automatically by the Blockstack API, more about this later. What the browser displays depends on the users’ current state.
Using web app Has client edition installed 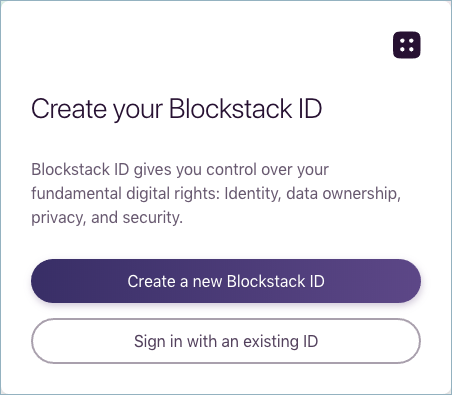
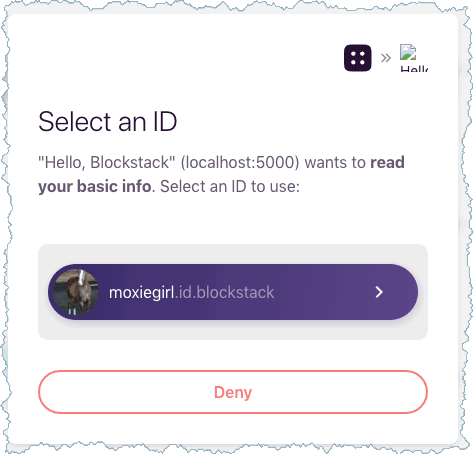
If the user logged into the Blockstack Browser but not reset it, the user can simply use the exiting identity.
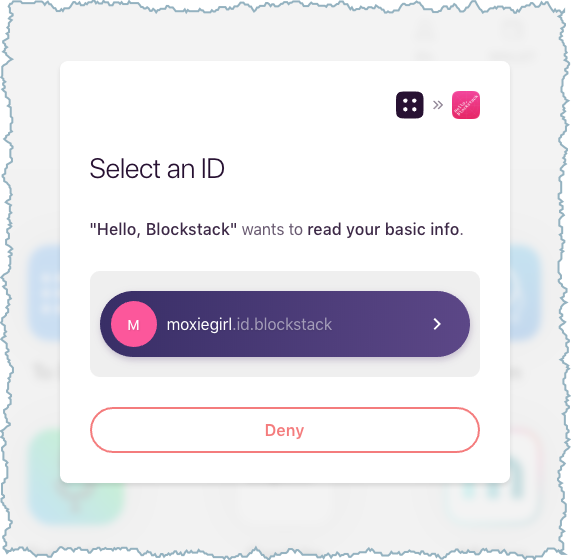
If the user chooses Deny, the Blockstack Browser displays its Home page but the user is not logged into the sample application.
-
Leave your new application running and move onto the next section.
Understand the generated application code
In this section, you look at the basic application generated with the yo
blockstack command. The generated code contains simple authentication methods
that allow a user to log into the browser. The main application code is located
in the src/App.js file. Open this file now.
All of the code in the file is wrapped in an event listener.
import React, { Component } from 'react';
import Profile from './Profile.js';
import Signin from './Signin.js';
import {
  UserSession,
  AppConfig
} from 'blockstack';

const appConfig = new AppConfig()
const userSession = new UserSession({ appConfig: appConfig })
  ...
The appConfig contains configuration data for the app while the userSession objects represent the instance of a user on this app. On browser platforms, creating an AppConfig instance without any arguments will use window.location.origin as the app domain. On non-browser platforms, you need to specify an app domain as the first argument. You can refer to the blockstack.js Library Reference for information about available functions.
The UserSession API supplies both sign in and sign out that handle user onboarding for you with a set of defaults:
  handleSignIn(e) {
    e.preventDefault();
    userSession.redirectToSignIn();
  }

  handleSignOut(e) {
    e.preventDefault();
    userSession.signUserOut(window.location.origin);
  }
This render code checks if the user is signed in or not:
  render() {
    return (
      <div className="site-wrapper">
        <div className="site-wrapper-inner">
          { !userSession.isUserSignedIn() ?
            <Signin userSession={userSession} handleSignIn={ this.handleSignIn } />
            : <Profile userSession={userSession} handleSignOut={ this.handleSignOut } />
          }
        </div>
      </div>
    );
  }
The isSignInPending() method loads the userData or not depending on the sign in determination.
  componentDidMount() {
    if (userSession.isSignInPending()) {
      userSession.handlePendingSignIn().then((userData) => {
        window.history.replaceState({}, document.title, "/")
        this.setState({ userData: userData})
      });
    }
  }
A single Sign in with Blockstack or Logout button is rendred and presented to the user. The Profile.js code actually renders the user data.
render() {
    const { handleSignOut, userSession } = this.props;
    const { person } = this.state;
    return (
      !userSession.isSignInPending() ?
      <div className="panel-welcome" id="section-2">
        <div className="avatar-section">
          <img src={ person.avatarUrl() ? person.avatarUrl() : avatarFallbackImage } className="img-rounded avatar" id="avatar-image" alt=""/>
        </div>
        <h1>Hello, <span id="heading-name">{ person.name() ? person.name() : 'Nameless Person' }</span>!</h1>
        <p className="lead">
          <button
            className="btn btn-primary btn-lg"
            id="signout-button"
            onClick={ handleSignOut.bind(this) }
          >
            Logout
          </button>
        </p>
      </div> : null
    );
  }

  componentWillMount() {
    const { userSession } = this.props;
    this.setState({
      person: new Person(userSession.loadUserData().profile),
    });
  }
When the user is signed in, Blockstack loads the user data from local storage and displays the profile and a Logout button. If the user is signed out, the application displays Sign in with Blockstack button. When the user presses this button, the user has a pending sign in request, the application sends the user into the Blockstack onboarding, signs the user in, and redirects the user back to the home page.
Application manifest
The application’s /public/manifest.json file configures your app. The
configurations dictate how the application is displayed in auth views and on
user home screens. The contents are very simple:
{
  "name": "Hello, Blockstack",
  "description": "A simple demo of Blockstack Auth",
  "icons": [
    {
    "src": "favicon.ico",
    "sizes": "192x192",
    "type": "image/png"
    }
  ],
  "start_url": "./index.html",
  "display": "standalone"
}
Keep it as is or fill it in with new information that describes your app.
Congratulations you are all done!
You’re done! You just built your first Blockstack app and shipped the code. You’re well on your way to becoming a Blockstack app legend. If you want to save your code, you can upload it to GitHub or similar code repository.